![]()
![]()
Appendix A - Using Web Browsers to Search LDAP
Recent releases of popular web browser software support searching LDAP databases to find email addresses. The following sections provide procedures for using browsers from Microsoft and Netscape to find addresses to use to send electronic mail.
LDAP for StreetTalk supports the Lightweight Directory Access Protocol (LDAP). You can use certain web browser's email clients, as well as any LDAP-enabled address books, to search LDAP for StreetTalk for email addresses, and add these email addresses to an address book. Users behind corporate firewalls may be restricted from using the LDAP protocol.
Examples of web browsers you can use with LDAP for StreetTalk version 3 include:

Netscape Communicator 4.0 or later Internet Explorer 4.0 or later email client (Outlook Express)
Netscape Communicator 4.0 or Later
To Configure Communicator to Search StreetTalk for Email Addresses
1. With the browser open, select Edit, Preferences.
2. Select Mail & Newsgroups, or Mail & Groups, from the Category window and click the +.
3. Click Directory.
4. Click New.
5. Fill in these three fields:
Description -- Fill in an appropriate description.
LDAP Server -- Enter your server name and domain, for example, servername.domain.com.
Search root -- Enter the directory suffix you entered when you configured the LDAP for StreetTalk service.6. Click OK.
To Search for Email Addresses
1. With the browser open, select Communicator, Address Book.
2. Enter the name you are looking for.
3. From the list of directories, select your LDAP directory.
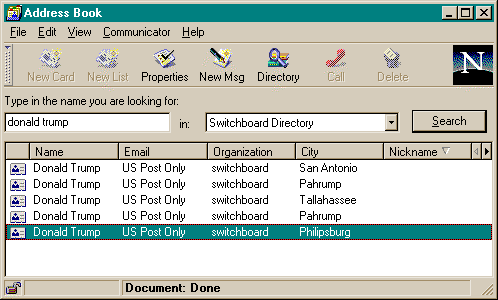
4. Click Search. A list of users appears (Figure A-1). Click on the icon in the left column to get details.
Internet Explorer 4.0 with Outlook Express
To Configure The Internet Explorer Email Client to Search StreetTalk For Email Addresses
1. Click Mail on the Standard Button toolbar.
2. Select New Message. The New Message dialog appears.
3. Select Tools, Address Book. The Address Book dialog appears.
4. Select Tools, Accounts. The Internet Accounts dialog appears with the Directory Service tab showing a list of the configured accounts for searching for an address.
5. Click Add. The Internet Connection Wizard starts. Follow the directions on the screen to add a new account to the configured accounts list.
6. Click OK.
7. Click OK again.
To Search for Email Addresses
1. From the Address Book, click Find.
2. From the Look in list, select the account you added through the connection wizard.
3. Enter either a last name, or first and last name in the name field, and click Find Now.
LDAP returns a list of matching entries. Double-click any entry to get detailed information about that entry.
4. Use the information from the list to address electronic mail messages.
![]()
![]()
![]()